The short answer
Hazy headlights are fixable when the deterioration is on an otherwise intact exterior plastic lens. The responsible fix is not simply to make the surface shiny: it is to assess the assembly, remove or level the damaged exterior layer in controlled stages, refine and polish the surface, and apply protection suited to that process.
If the cloudiness is inside the assembly—or the lens, housing, mounts, reflector, projector, bulb, wiring, ballast, or module is damaged—exterior restoration will not solve the underlying problem. That condition needs diagnosis, repair, or replacement.
A useful first check is simple:
- With the lamps switched off and cool, wash the exterior gently with water, a soft cloth, and vehicle-wash soap.
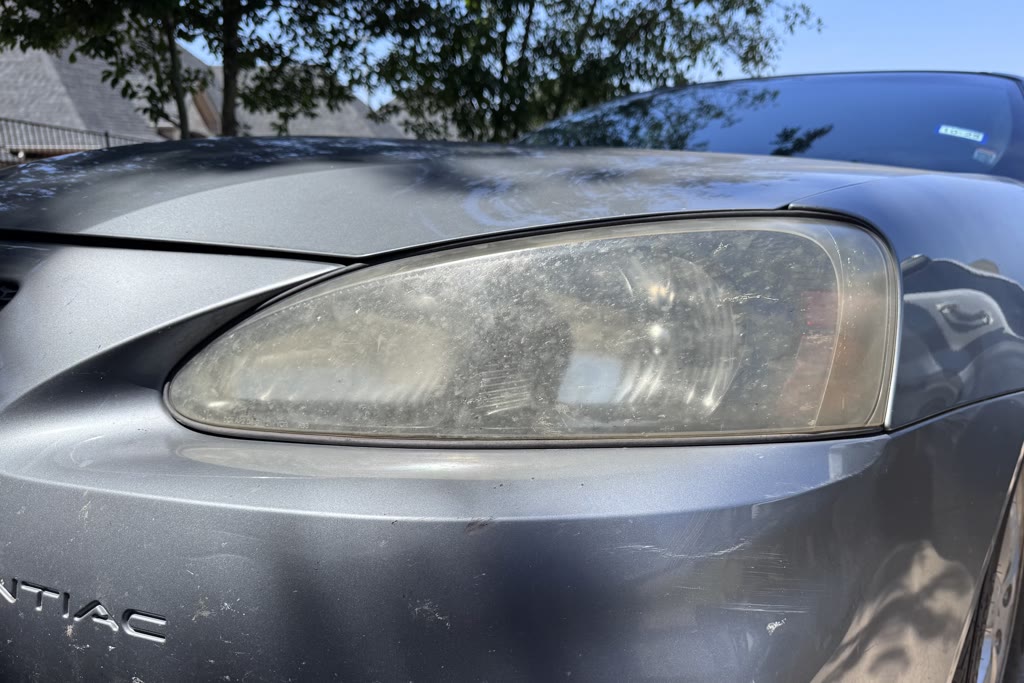
- Look across the dry lens in daylight. A chalky, yellowed, rough, or weathered outer surface points toward exterior deterioration.
- Look for mist, droplets, streaks, or standing water behind the outer surface. If wiping the outside does not affect what you see, the condition may be internal.
- Check for cracks, broken mounts, deformation, loose parts, and lighting faults before deciding to restore the lens.
Do not rely on one visual clue alone. Lens condition, prior work, and the rest of the headlamp assembly all affect the right next step.
Why headlights become hazy
Many modern headlamp outer lenses are polycarbonate with a protective exterior coating. AAA’s focused headlamp-lens deterioration research report explains that this thin film improves scratch resistance and helps protect the lens from ultraviolet light. As the exterior surface weathers or is damaged, it may become yellowed, dull, hazy, or uneven.
What looks like one problem can have several causes:
- Weathering and ultraviolet exposure: the exterior hardcoat can deteriorate, producing yellowing, dullness, haze, or an uneven surface.
- Road exposure and abrasion: grit, washing wear, and small surface impacts can leave fine scratches, pitting, or a rough texture that remains visible even after oxidation is corrected.
- Deposits and contamination: road film, mineral spotting, and residue can sit on the surface. Some contamination can be cleaned away; etching or damage beneath it may require correction.
- Chemical or heat damage: General Motors warns that concentrated cleaners, solvents, alcohol, some compounds, and excessive heat can craze, crack, glaze, or deform polycarbonate lenses. This damage is different from ordinary removable dirt.
- Previous incomplete restoration: a lens may look clear immediately after polishing but become hazy again when damaged material, sanding marks, or a missing or failing protective layer remain. Repeated correction can also make a later restoration more difficult to complete evenly.
Cleaning the lens first helps separate removable residue from exterior deterioration. Its condition and any earlier restoration work then help determine whether another restoration or replacement is the better next step.
Is the haze outside or inside?
The word “foggy” is ambiguous. Some people mean a yellowed exterior lens; others mean actual moisture inside the assembly. Those conditions do not have the same fix.
Signs that point toward exterior deterioration
- The outer surface looks yellowed, chalky, milky, dull, or uneven.
- The texture or discoloration is visible on the outside and may feel rough after gentle cleaning.
- Both lamps show similar sun- and weather-exposed deterioration, although one side can be worse.
- There is no standing water, internal streaking, or evidence of a damaged housing.
Signs that call for internal or assembly diagnosis
- Mist, beads, large droplets, streaks, or a puddle are visibly behind the outer lens.
- The condition does not change when the exterior is cleaned.
- The lens or housing is cracked, a mounting tab is broken, or a component is loose.
- A bulb, projector, reflector, connector, ballast, module, or other lighting component is not working correctly.
Vented headlamps can develop temporary internal condensation as temperature and humidity change. Ford’s owner guidance says a fine mist can be a normal by-product of a vented design and may clear in dry conditions, while large droplets, streaks, or pooled water call for inspection. Standards and acceptable behavior can vary by vehicle, so use the owner manual for the specific model rather than applying one manufacturer’s time or coverage threshold to every headlamp.
The focused inside-or-outside haze guide provides a diagnostic comparison without turning the check into a restoration procedure.
What exterior restoration can fix
Exterior restoration may be appropriate when the lens has eligible oxidation, yellowing, surface haze, shallow weathering, or correctable surface irregularity and the rest of the assembly is intact and working. Its purpose is to preserve the installed assembly by correcting the damaged outer surface.
The final appearance depends on the starting condition. Deep pitting, cracks, severe crazing, heat deformation, chemical damage, or marks from earlier work may remain visible or mean replacement is the better choice.
Exterior restoration does not repair:
- persistent moisture or haze inside the assembly;
- failed seals, cracked lenses or housings, or broken mounting points;
- damaged reflectors, projectors, or internal optics;
- inoperative bulbs, wiring, connectors, ballasts, modules, or other electrical parts; or
- severe exterior deterioration or repeated prior restoration that cannot be corrected evenly.
Those conditions may require targeted repair or replacement. A clearer-looking exterior also is not a substitute for checking lamp operation and aim when there is a performance concern.
What a responsible restoration involves
A restoration method should be chosen for the actual condition rather than applied as a fixed recipe to every lens. The broad sequence is:
- Assessment: confirm that the deterioration is exterior, inspect the assembly and lighting operation, and identify prior work or damage that may change the approach.
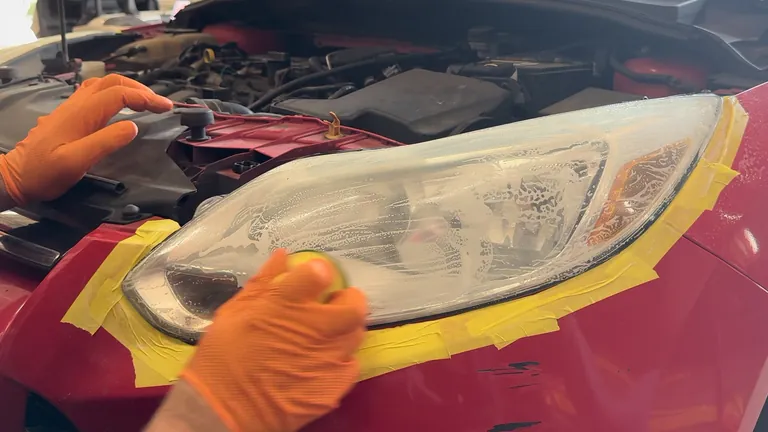
- Preparation: clean the lens, protect adjacent paint and trim, and establish safe working conditions. The lamp should be off and cool.
- Correction: remove or level the deteriorated exterior material with a controlled abrasive step appropriate to the defect.
- Refinement: use progressively finer stages so the marks from one correction step do not remain under the finished surface.
- Polishing and inspection: bring the refined surface to a clearer finish and inspect it under useful lighting before protection.
- Protection: apply the finish specified for the system. Polishing alone does not recreate the original weathered coating.
- Curing and final review: follow the protection product’s exact temperature, moisture, handling, and cure instructions, then review the result in the context of the lens’s starting condition.
Those stages are intentionally high level. Abrasives, protective finishes, application conditions, safety precautions, and cure requirements vary by system. Anyone using a restoration kit should follow that kit’s complete instructions rather than mixing steps or timing from unrelated products.
Do household remedies or kits work?
Toothpaste, baking soda, vinegar, and similar shortcuts
A mild household abrasive may remove grime or temporarily change the appearance of very light surface dullness. It is not a controlled way to diagnose the damage, progressively correct a weathered layer, and provide suitable exterior protection. An acidic cleaner may affect some mineral residue without reversing degraded polycarbonate or hardcoat.
The larger risk is treating every cloudy lens as dirt. Harsh chemicals, concentrated cleaners, alcohol, bug spray, and general-purpose solvents are not responsible headlamp-restoration products. The GM exterior-lamp damage bulletin documents crazing, cracking, glazing, and other damage associated with chemicals, improper cleaning, and excessive heat. If a product does not explicitly identify the lens material and intended use, keep it off the lamp.
Store-bought restoration kits
A complete kit can be a reasonable DIY choice for an eligible exterior lens when the user can follow every step and precaution. Compare kits by the system they provide, not by the strongest “before and after” picture on the package:
- Does it distinguish cleaning from actual defect removal?
- Does it include enough refinement stages to remove the preceding abrasive marks?
- Does it include a compatible protective step rather than stopping at temporary gloss?
- Are personal-protection, temperature, moisture, application, and cure requirements clear?
- Is there enough material for both lenses and for corrections if a stage is uneven?
Kit contents and protection systems vary. Follow the specific instructions from start to finish; do not mix cure times, abrasives, or chemicals from unrelated systems.
DIY, professional restoration, or replacement?
For a deeper decision check without step-by-step restoration instructions, compare DIY headlight restoration with professional service.
| Option | Usually fits | Main tradeoffs |
|---|---|---|
| DIY kit | An eligible exterior lens, a complete vehicle-specific or lens-safe system, and an owner comfortable with careful preparation and staged correction | Lower direct cost, but the user supplies the time, tools, technique, protective application, working conditions, and responsibility for an uneven or incomplete result |
| Professional exterior restoration | Eligible exterior oxidation, yellowing, haze, or uneven weathering on an intact, working assembly—especially when the condition needs more than routine cleaning, the owner wants the lenses assessed before work begins, or they prefer a technician to handle the staged correction, polishing, and protective finish | Adds assessment, equipment, technique, protection, and convenience; the result still depends on starting condition and does not correct internal, structural, or electrical faults |
| Repair or replacement | Persistent internal moisture, failed seals, cracks, broken mounts, damaged optics, electrical faults, severe deformation/crazing, or a lens that cannot be corrected responsibly | Addresses conditions exterior restoration cannot reach; scope and cost depend on the vehicle and whether a component or complete assembly is required |
Choose in that order: identify the location and type of damage, confirm the assembly is intact and working, then compare the level of correction the lens needs with the tools and finish available. Replacement should not be the automatic answer to correctable exterior weathering, and restoration should not be used to disguise a condition that needs repair.
Care after restoration
Care cannot make any finish permanent, but it can avoid preventable damage:
- Wash a cool lens with water, a soft cloth or wash mitt, and properly diluted vehicle-wash soap.
- Rinse away grit before wiping; avoid dry rubbing and aggressive scrubbing.
- Keep concentrated cleaners, solvents, alcohol, bug spray, tire chemicals, and unapproved compounds off the lens.
- Do not cover an illuminated headlamp; trapped heat can damage the lens or housing.
- Follow the restoration product’s cure and care instructions before washing or exposing the finish to moisture.
- Inspect changes rather than repeatedly polishing on a schedule. New cracks, persistent water, electrical faults, or a rapidly failing surface call for diagnosis.
- When practical, reducing unnecessary outdoor exposure can reduce additional weathering. Finish life still varies with exposure, care, and the lens’s starting condition.
The goal is a properly prepared and protected exterior surface. Final appearance and finish life vary with lens condition, prior work, exposure, and care.
An authentic result—with real limits
A before-and-after comparison documents what happened to one vehicle under one starting condition. Results differ when pitting, prior work, or internal damage changes what can be corrected on another lens.
Actual Get Clear Lights work
Cloudy Lens Restoration
2011 Ford Fusion
Starting condition: Dense surface haze covered the passenger-side headlight lens and muted the reflector detail across the assembly.
Headlights


Result note: After exterior restoration, the reflector sections and lens details are much more clearly visible through the refreshed surface.
These photographs show this completed exterior restoration only. Lighting, angle, camera exposure, and the original lens condition can affect how a comparison appears.
Sources
- Headlamp, Tail Lamp, License Lamp, or Fog/Driving Lamp Damage — Bulletin 02-08-42-001JGeneral Motors service bulletin hosted by NHTSA · Accessed
- Headlamps — Frequently Asked QuestionsFord Owner Support · Accessed
- Headlamp Lens DeteriorationAAA research report · Accessed